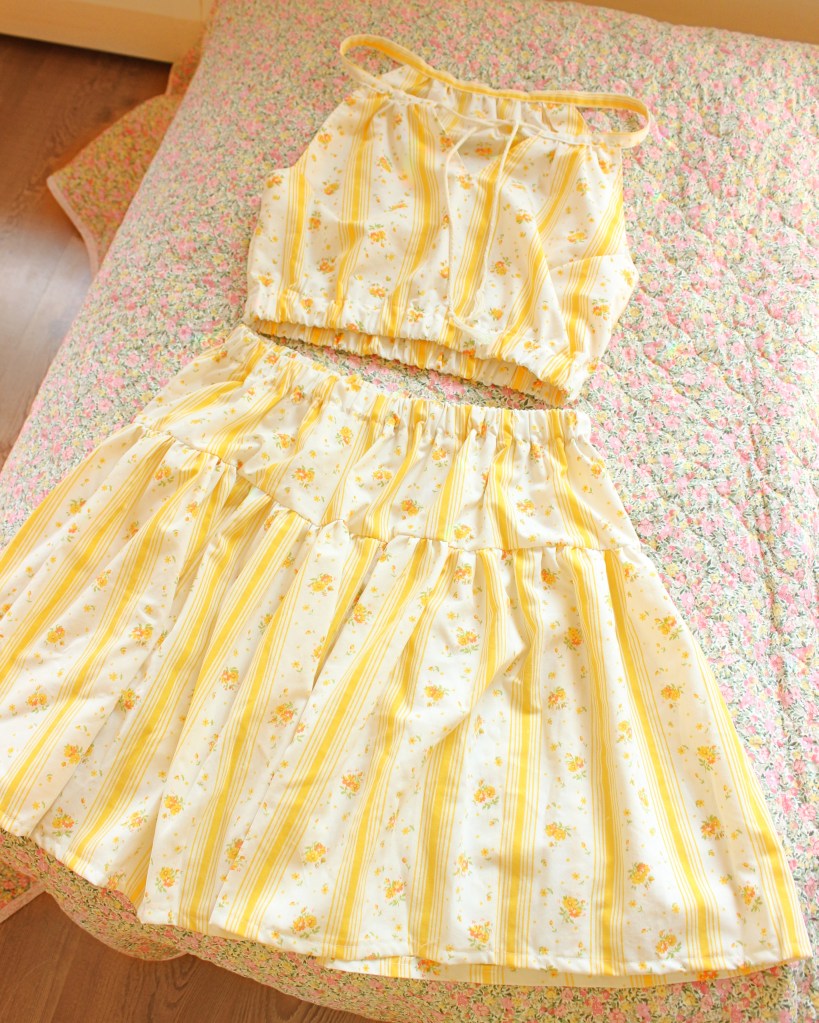

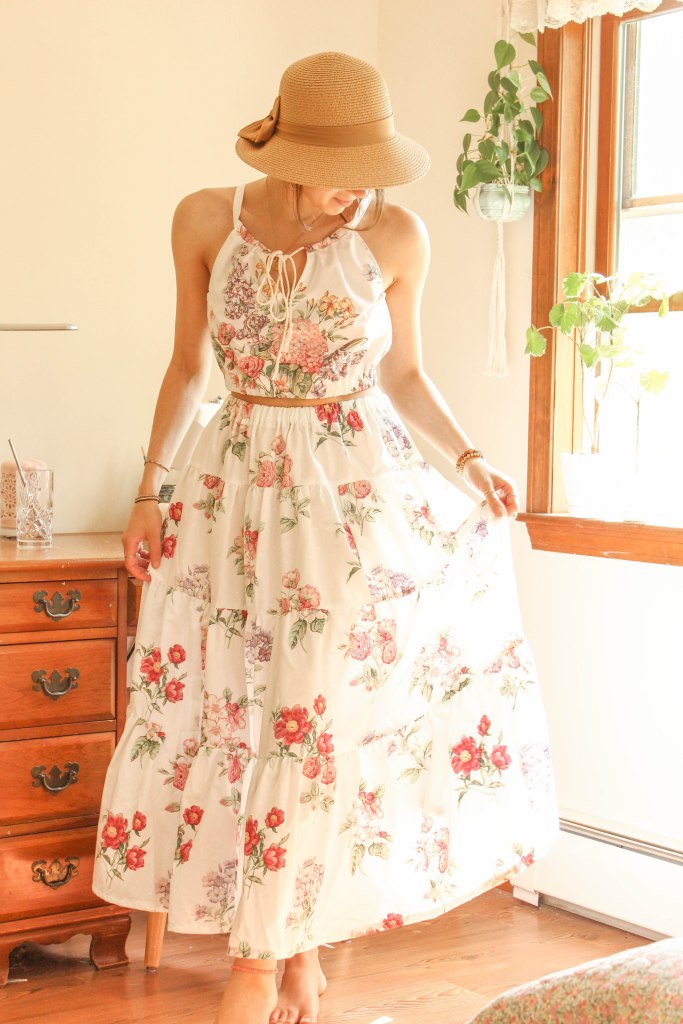
Like I said in my previous post, I knew that eventually I would get to posing my maxi skirt tutorial, and today’s the day! I’ve been sewing nonstop, and it all pretty much started with this skirt. Now I’m making dresses, shorts, matching pants + halter top duos, bandanas, and cropped blouses (all of which I’m sure you’ll see in future posts!).

Over the last few months I’ve been prioritizing my gut health. IBS symptoms started showing up last year during all the stressful situations of 2022, and I knew that my intestines were begging for my help and attention. As I’ve been dealing with this, I haven’t been able to wear leggings, tight jeans, or anything that puts pressure on my stomach or intestines. If I do, I end up with horrible cramps and bloating. Wonderful, I know.
Sweatpants and loose pants are what I’ve been living in, and although it’s a very comfy life, after a while, it really starts to make me feel a bit…slumpy. So I’ve been getting super excited to break out my sundresses with the warmer weather arriving. Cute, comfy, and no pressure on the stomach!
Although I have a dozen cute dresses in the closet, I don’t really own skirts, and I thought it was time to change that. After all, I did have a pile of thrifted bedsheets in my closet just waiting for the perfect sewing project!

You may have seen my recent post on the DIY summer romper that I sewed out of a bedsheet, and I will repeat: go to your local thrift shop and look through the sheet/curtain/tablecloth section. There’s so much fabulous fabric for amazing low prices!! But if the thrift shop fails to provide, Etsy is always there to help. Of course, the prices of vintage sheets on Etsy are much higher (the sellers know that suckers like me will pay them!), but if you’re willing to buy a skirt for $20, I think you should be willing to make a skirt for $20, too 😉

Anyways, I looked online for a tiered skirt sewing pattern, but nothing was quite what I was looking for, and many had instructions that just weren’t written clearly enough (I was just looking for basic measurements, without having to do math equations to figure them out). Since I couldn’t find what I was looking for (I probably would have eventually, I just gave up, ’cause I knew I could do it on my own), I gathered the important info and made my own pattern. And now I’m here to give you some simple, straightforward measurements.
*a quick note before I start: this skirt does take quite a bit of fabric to sew, so you may want to opt for a more lightweight fabric, so that it doesn’t weight itself down too much. The sheets I used are 50% cotton/50% polyester, and are extremely light and airy, so they work perfectly!
what this pattern makes
This pattern makes a 36” long skirt, and would fit anyone with hips or waist (whatever is larger) up to 45” in circumference (for reference, I have 33” hips, and a 28” waist).
If your waist doesn’t fit this pattern, it could easily be customized by adding however many inches you need to the length of the top tier (tier #1, the waistband), and then adding an extra 5″ to allow for comfortable movement. Then, add that same number of inches to the lengths of the rest of the tiers. (e.g. if you add 15″ to the tier #1, add 15″ to tier #2, tier #3, and tier #4).


supplies needed
- one bedsheet (or whatever fabrics will fit the pattern)
- 1″ elastic
- matching thread
- sewing machine
- pins
- measuring tape
- scissors
fabric pieces to cut
- tier #1: 8″ x 50″
- tier #2. 9″ x 70″
- tier #3: 10″ x 100″
- tier #4: 14″ x 170″
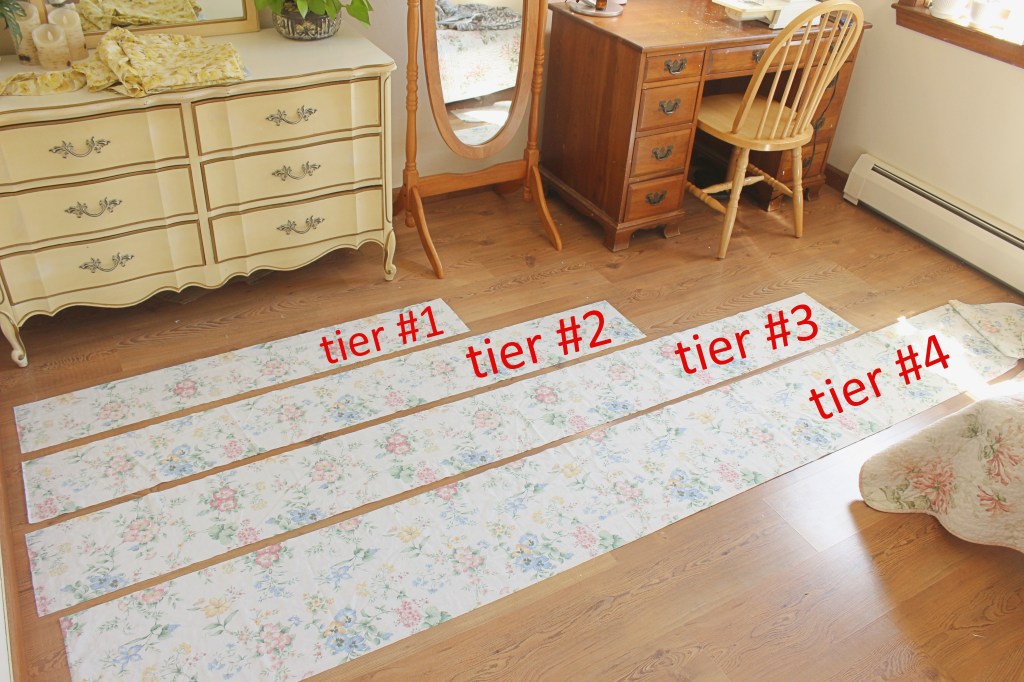
*note: you will most likely need to sew a couple pieces of fabric together to get the length of tier #4 (and maybe tier #3)
where to start
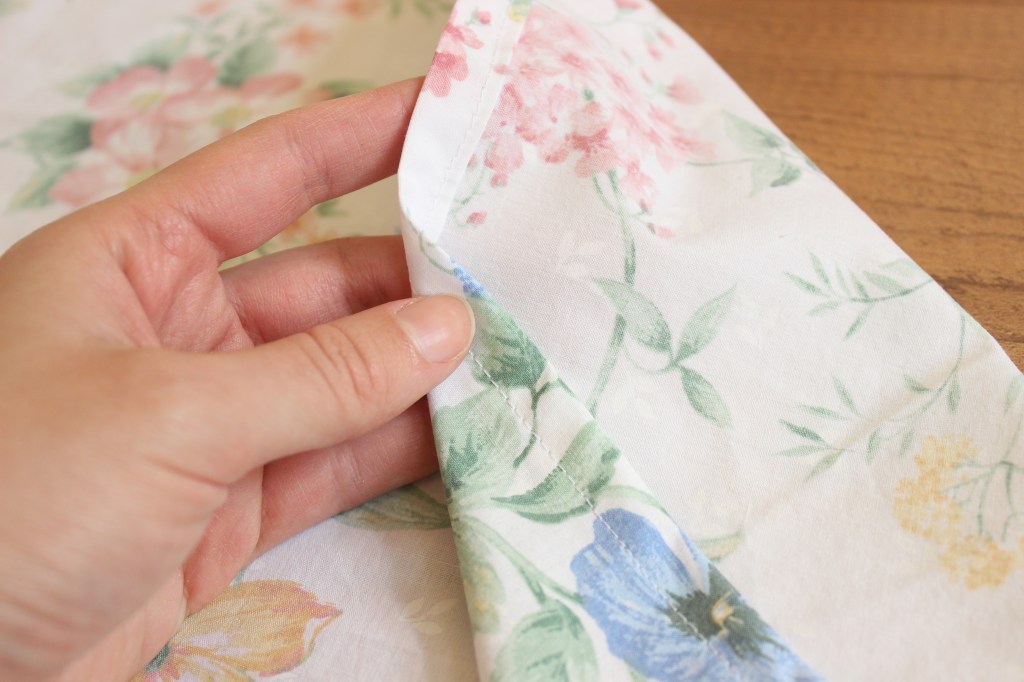
I make this skirt from the bottom up, so get started with tier #4 (the bottom tier). Begin with hemming the bottom edge of it by folding the edge over 1/2″, ironing it, and then folding it over another 1/2″. Sew with a 1/4″ seam.
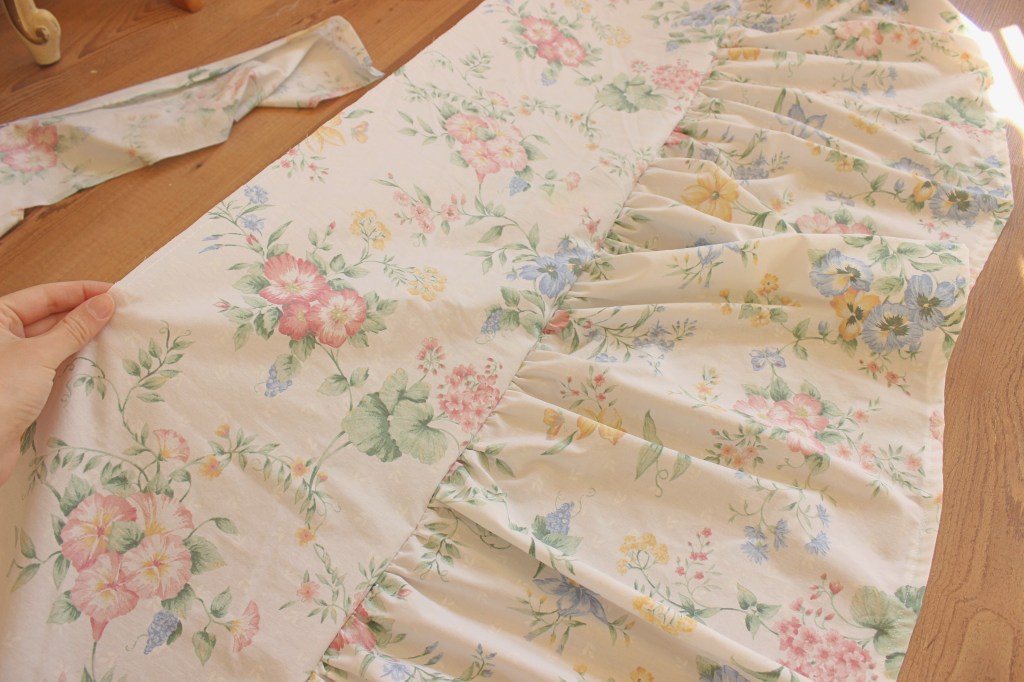
After that’s complete, sew a gathering stich along the top, raw edge of the same tier, and gather it to 100” inches long. This can be a bit of a time-consuming process, as you’re working with 170″ of fabric, but you’ll get there with a bit of patience!
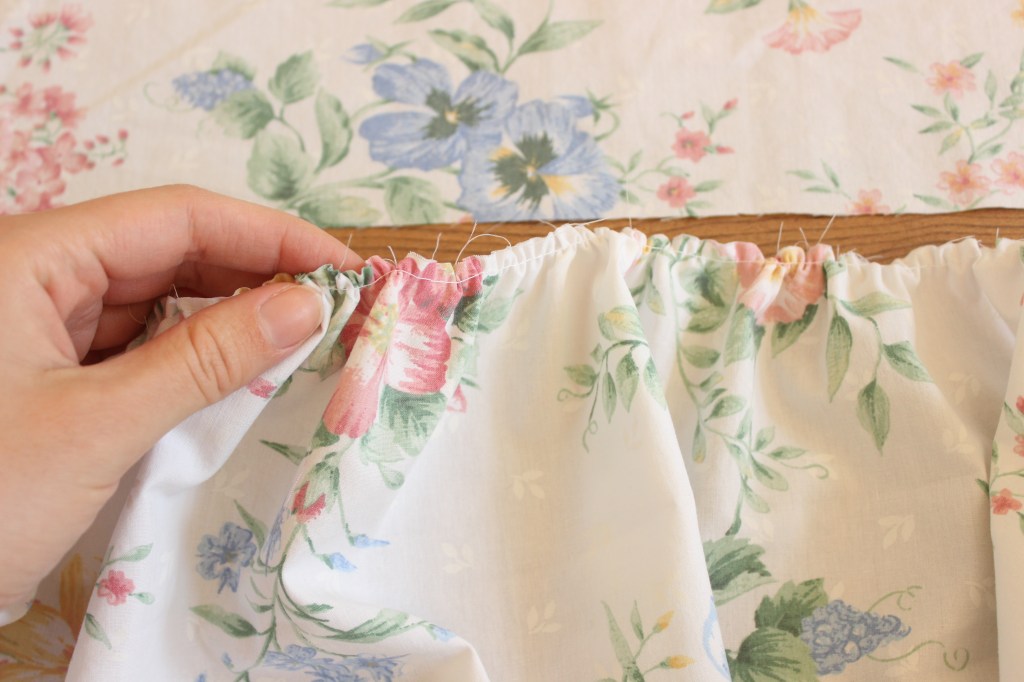
Once you’ve successfully gathered it to 100″ long (or, the length of tier #3), you will then pin the gathered edge of tier #4 to the bottom edge of tier #3, making sure that the right sides of the fabric are facing towards each other.

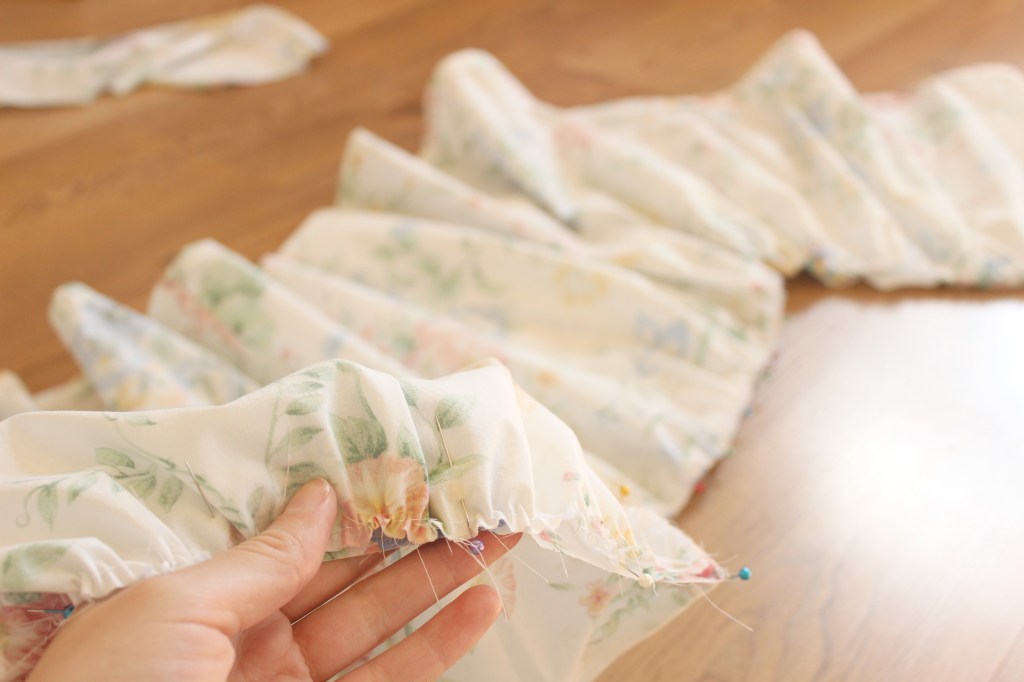
Now you’re going to sew tier #4 and tier #3 together with a 1/2″ seam.
now you’re going to repeat what you just did
Sew a gathering stitch on the top edge of tier #3, and gather the piece to 70″ long. Pin the gathered edge of tier #3 to the bottom edge of tier #2 (right sides of the fabric facing towards each other), and sew with a 1/2″ seam.
Repeat this one more time, now sewing a gathering stitch on the top of tier #3, gathering it to 50″, and pinning to the bottom edge of tier #1. Sew with a 1/2″ seam.
Now all four tiers should be sewn together, and you’re almost to the finish line!
sewing the skirt together
Next, you’re going to pin the the two raw edges of the skirt together (right sides together) to form the actual tube of the skirt body. Sew together with a 1/2″ seam.
*depending on how much your fabric frays, you may want to sew a serger stitch, or a simple zigzag stitch, along this raw edge to keep the fraying to a minimum.
adding the waistband
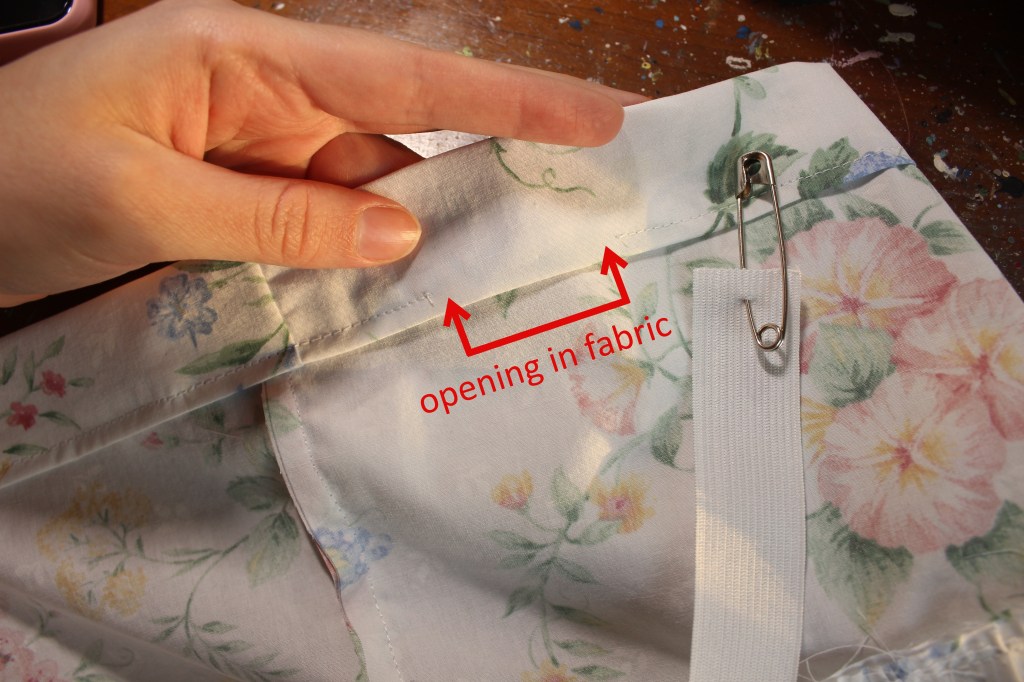
Now all there is left to do is add the elastic waistband. Begin with folding down the top edge of the skirt 1/2”, iron it flat, and then fold it over again about 1.5”. Sew along the far edge with a 1/4″ seam, creating a tunnel in the fabric. During this step: make sure to leave an opening an inch or two long to insert the elastic into!
measure you waist
My waist is about 28”, and I didn’t want my skirt to be tight on my stomach, so I cut a piece of elastic to 29” (the extra inch for seam allowance), giving it an easy fit. It doesn’t cut into my stomach or add unwanted pressure! If you’d like a skirt that’s a little snugger on you, you can cut the elastic an inch or two shorter than your waist measurement.
*note: if you’d like to wear the skirt lower (on your hips, rather than your waist), you can use your hip measurement and work with that length instead!
To easily get the elastic through, I attach a safety pin to one end of it, and use that to pull it through the fabric tube. Sew the ends of the elastic together (make a couple passes on it with the sewing machine, to make sure it’s nice a secure!), and then pull the ends into the fabric tube, and sew up the opening.
final touches
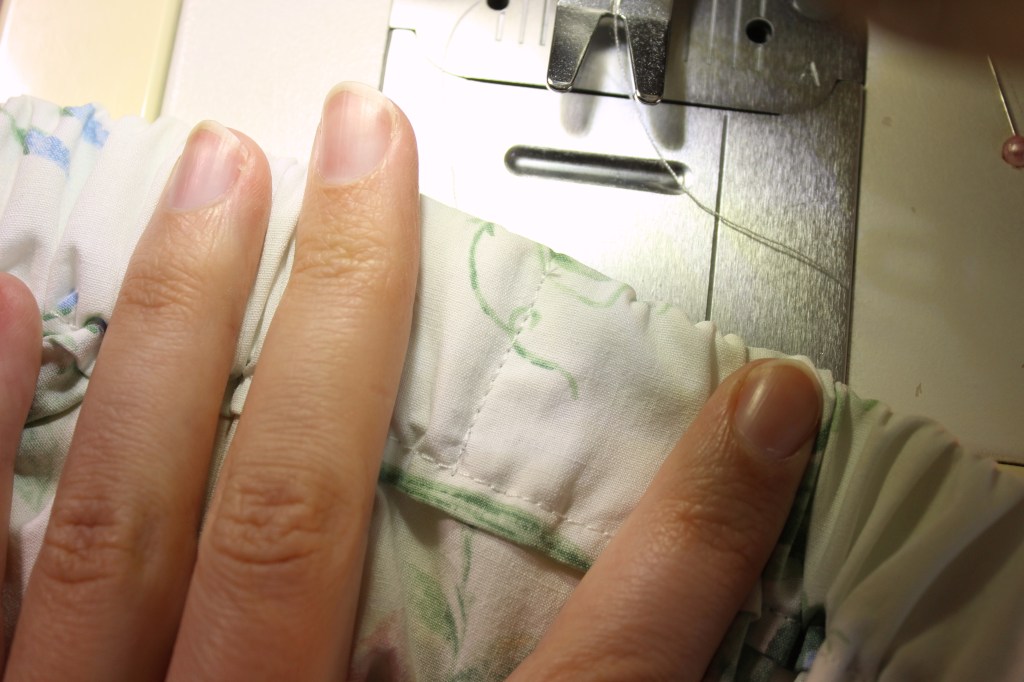
To make sure that the elastic doesn’t twist in the waistband, I like to sew two small seams on either sides of the waistband. The seams will disappear in the folds of the fabric, but will keep everything straight and secure!
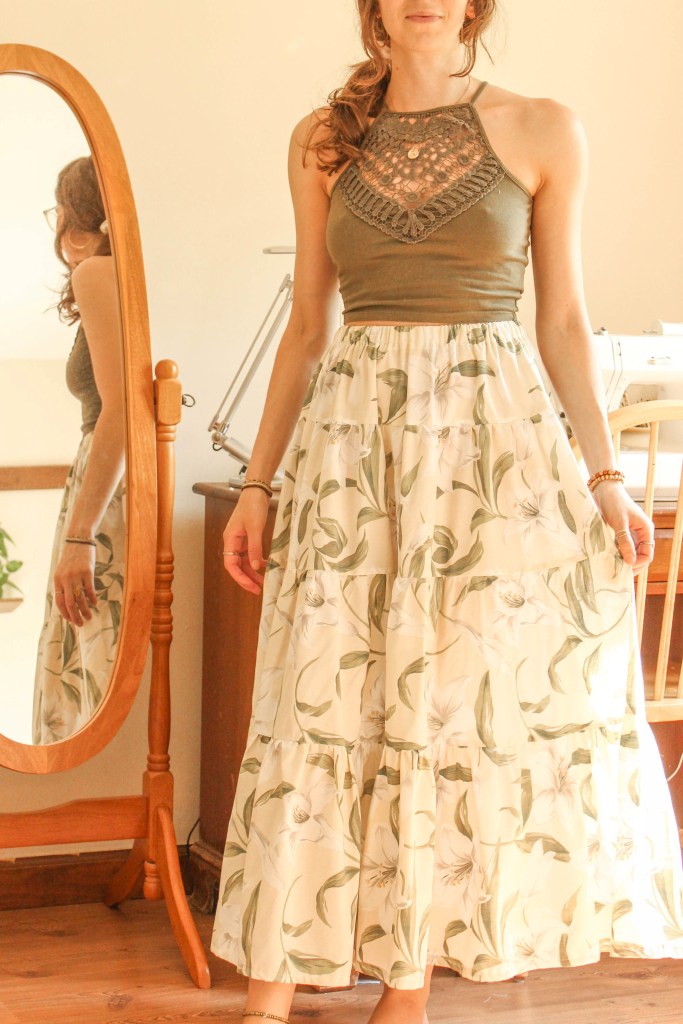
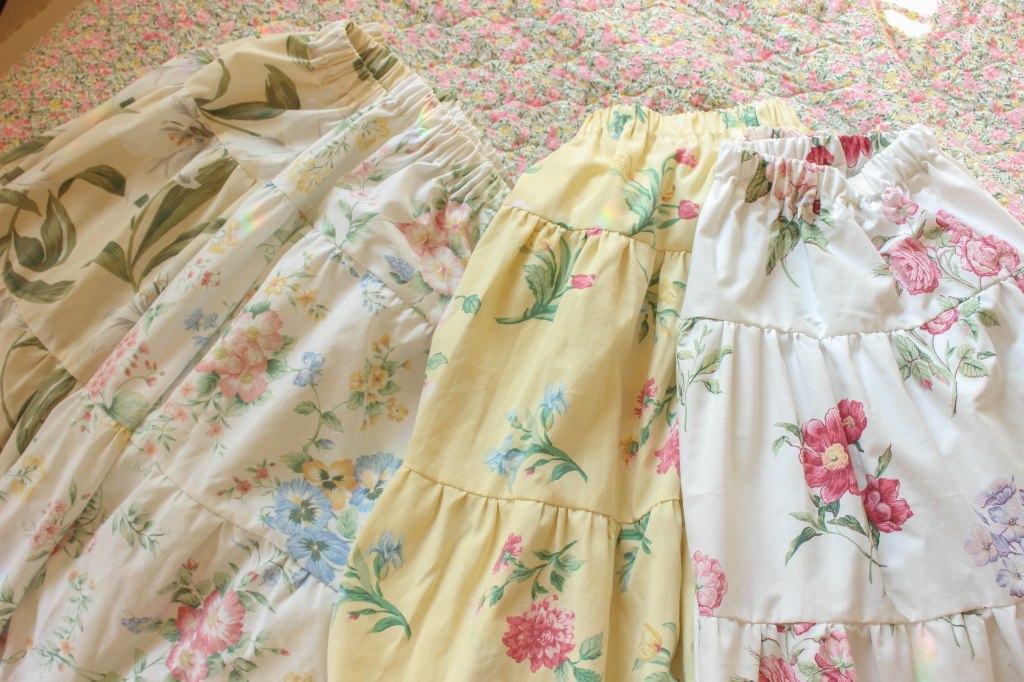
And there you have it! Trim all the loose threads, and your easy breezy maxi skirt is complete! Depending on what fabric(s) you choose to make it with, it could be a perfect addition to your spring, summer, or autumn wardrobe! Match it with a crop top and sandals, a cozy turtleneck, or a knit cardigan, and you’re good to go!
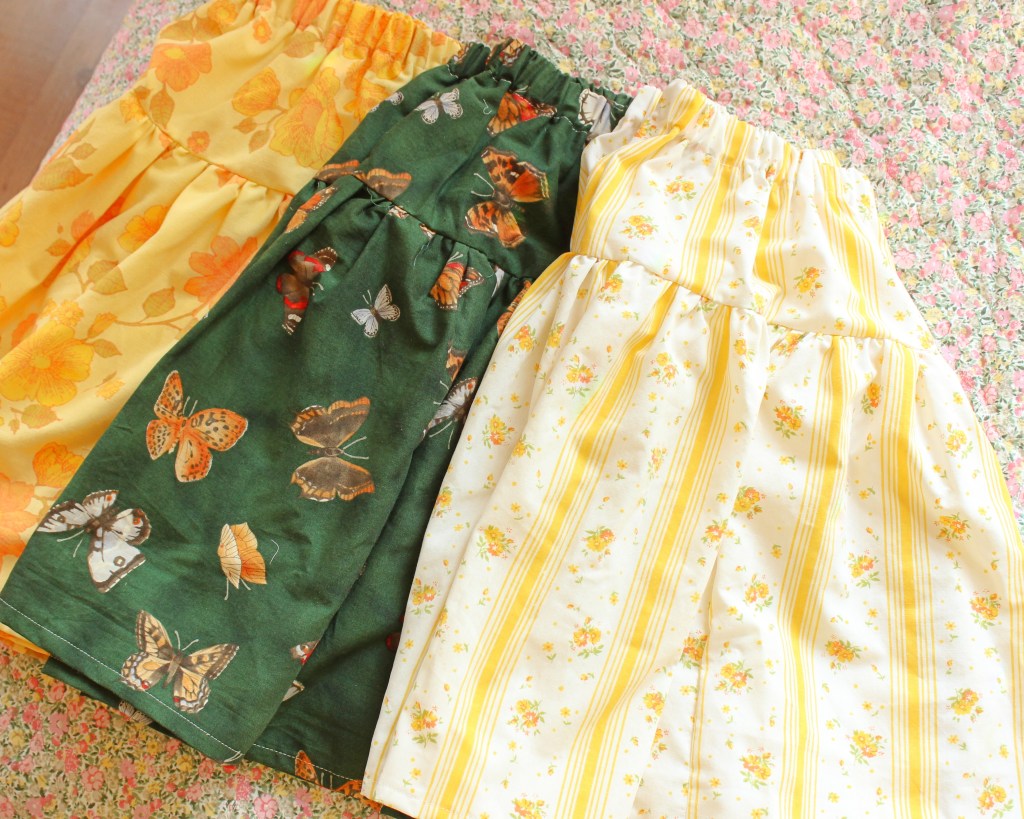
I currently have four maxi skirts in my closet now, and more to come. On my sewing to-do list is to make one with a different fabric for each tier, giving more of a patchwork look!
as an ending note:
Once you have your measurements, it’s easy to alter this pattern and create new variations! I used the same basic skirt techniques to make a mini skirt version, just using two tiers, instead of four. The top tier (waistband) is 8″ x 50″, and the bottom tier is 15″ x 100″, making a skirt 19″ in length!