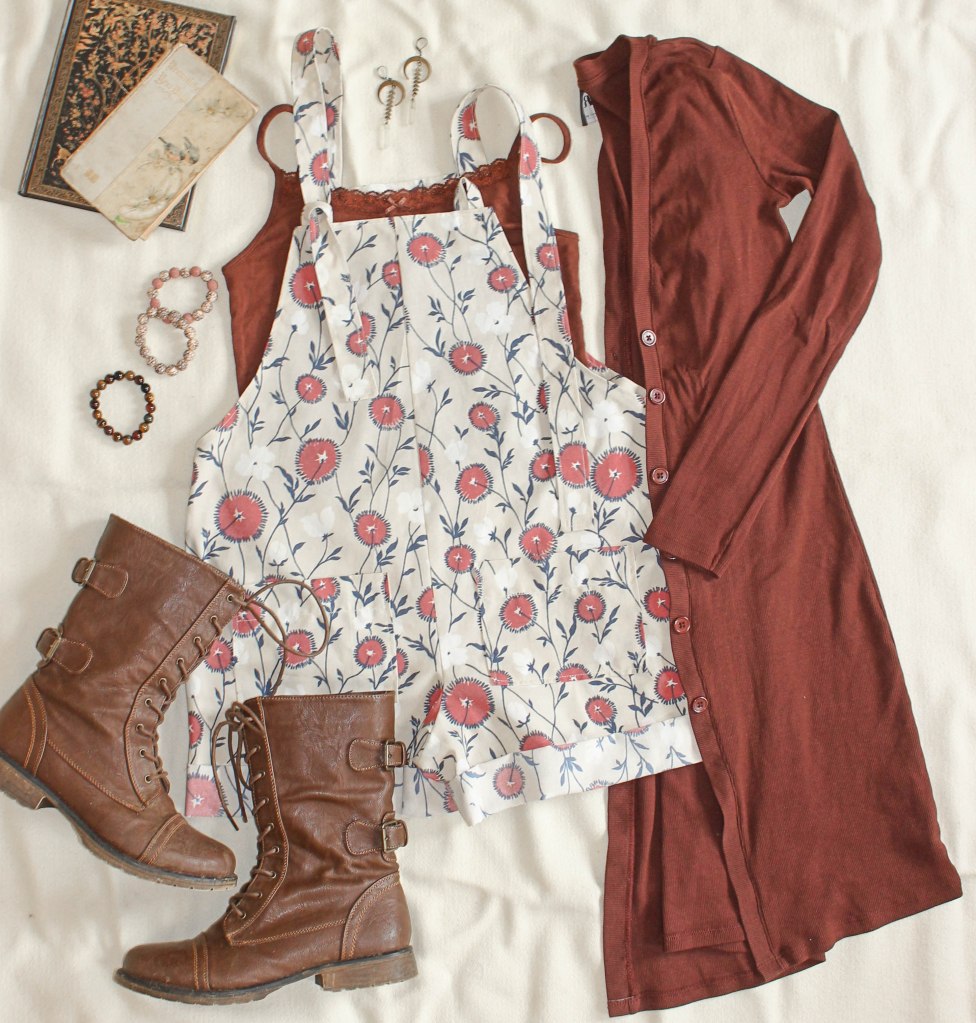


In my humble opinion, the best place to find lots of fabric for an affordable price is in the sheets/curtains/tablecloth section at the thrift shop. Reduce, reuse, recycle, and you can find some pretty nice patterns that you may not have found at the fabric store!

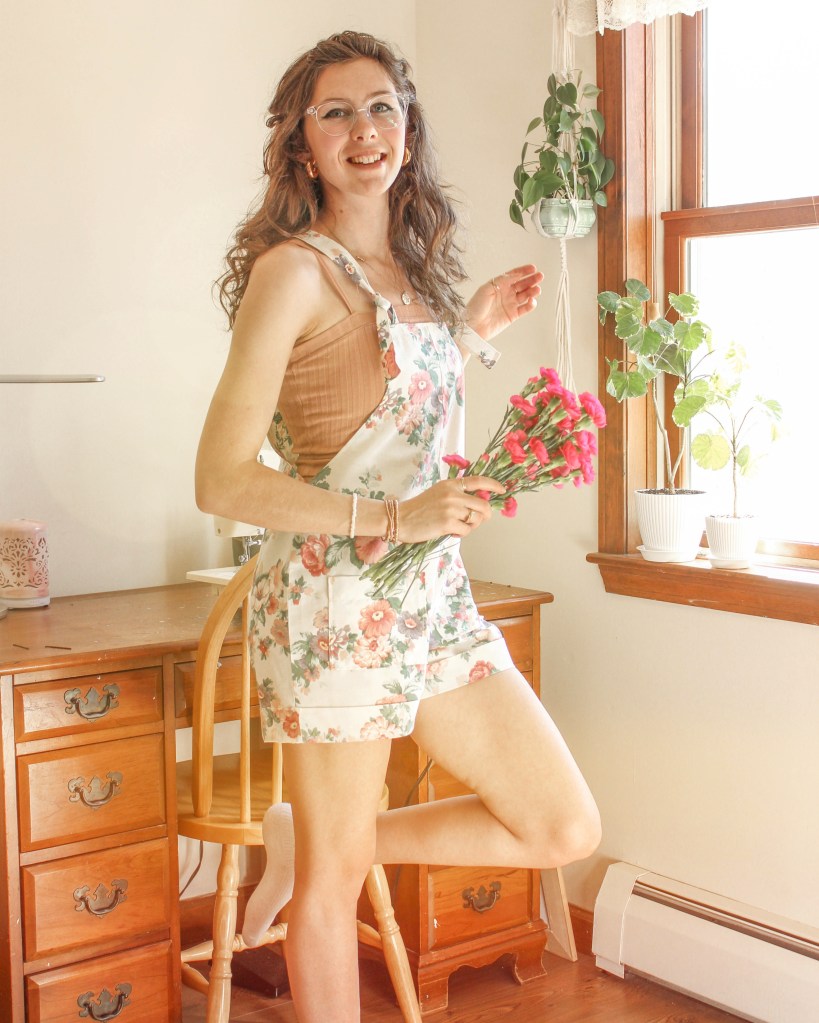
So that’s where I went when I found this cute summer romper pattern on Etsy that I wanted to try my hand at sewing!
Sewing is an every-now-and-then hobby for me, and I don’t usually enjoy getting into big, intense projects that take more than a couple days to complete (not to mention the shoulder and neck pain that come from cutting fabric, and hunching over a sewing machine!), so the simplicity of this pattern is what really drew my attention to it.
the pattern

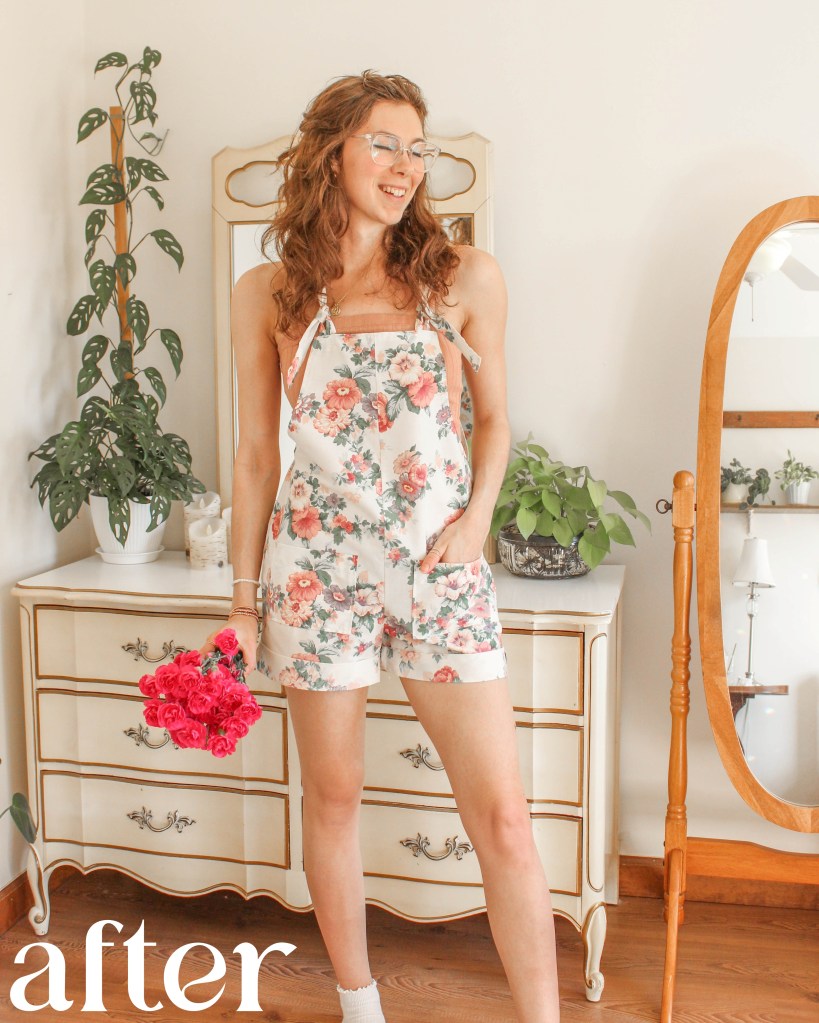
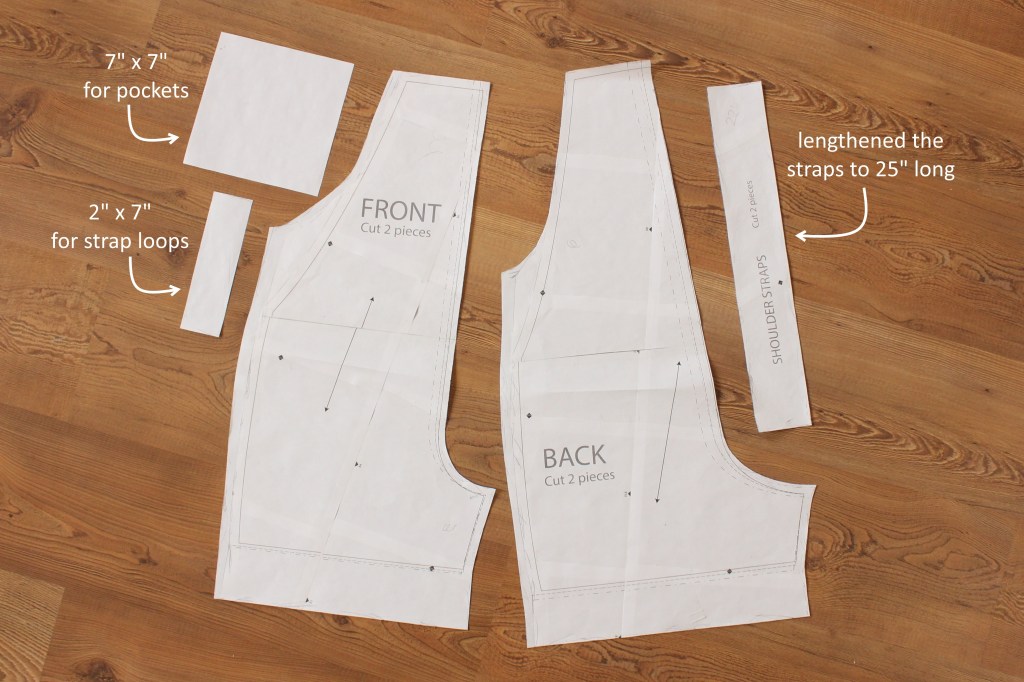
The pattern itself is an instantly downloadable file, and consists of three pieces that you print out: front, back, and strap. It’s an incredibly straightforward and simple pattern to follow – all straight lines, and single layers of fabric.
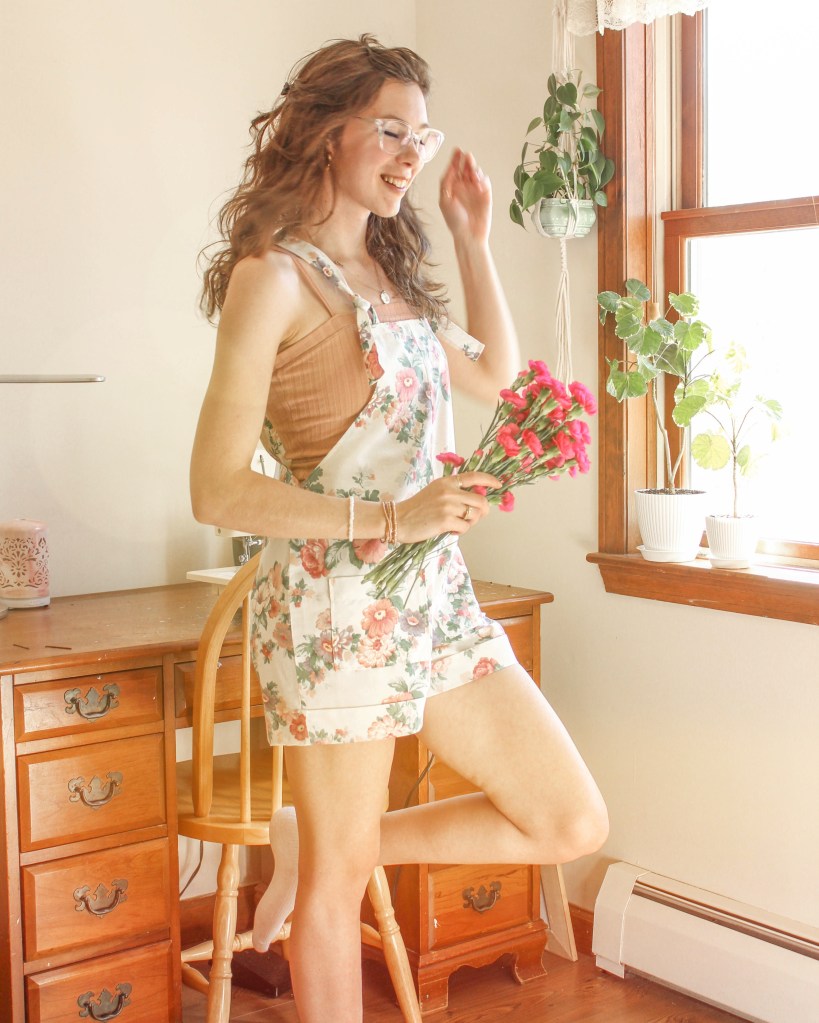
The first romper I made (following the exact pattern provided to me) came out quickly and easily, but it definitely needed some tweaking to fit me correctly.
my edits
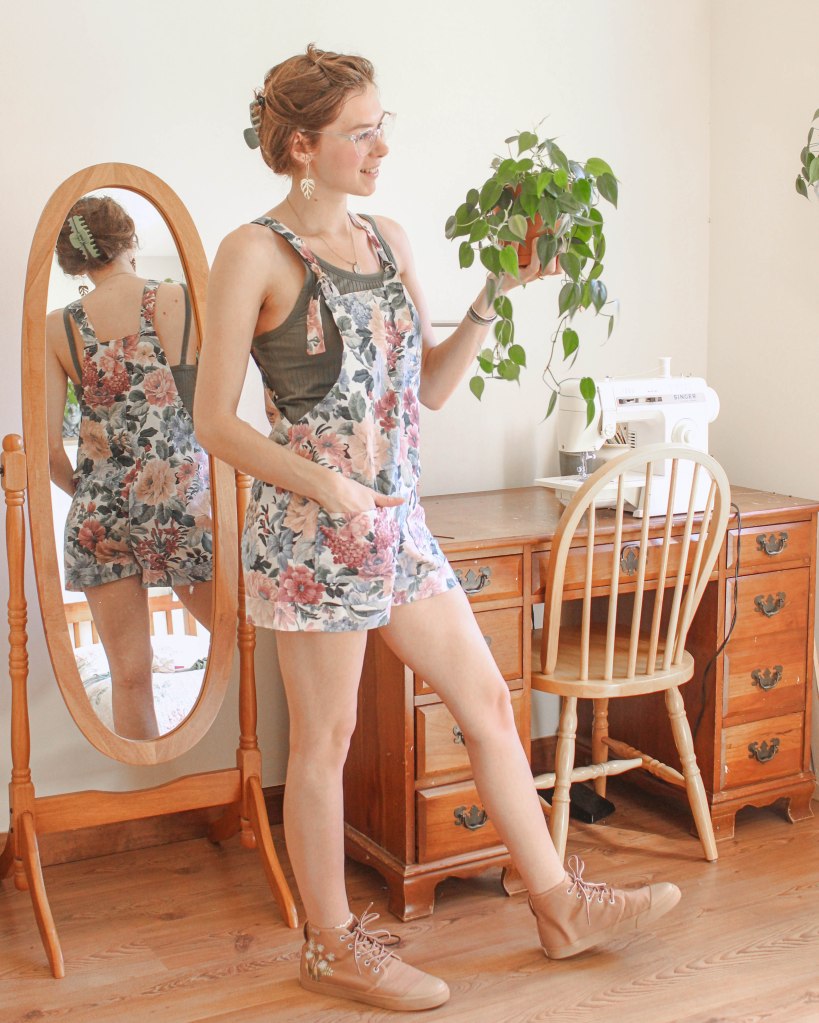
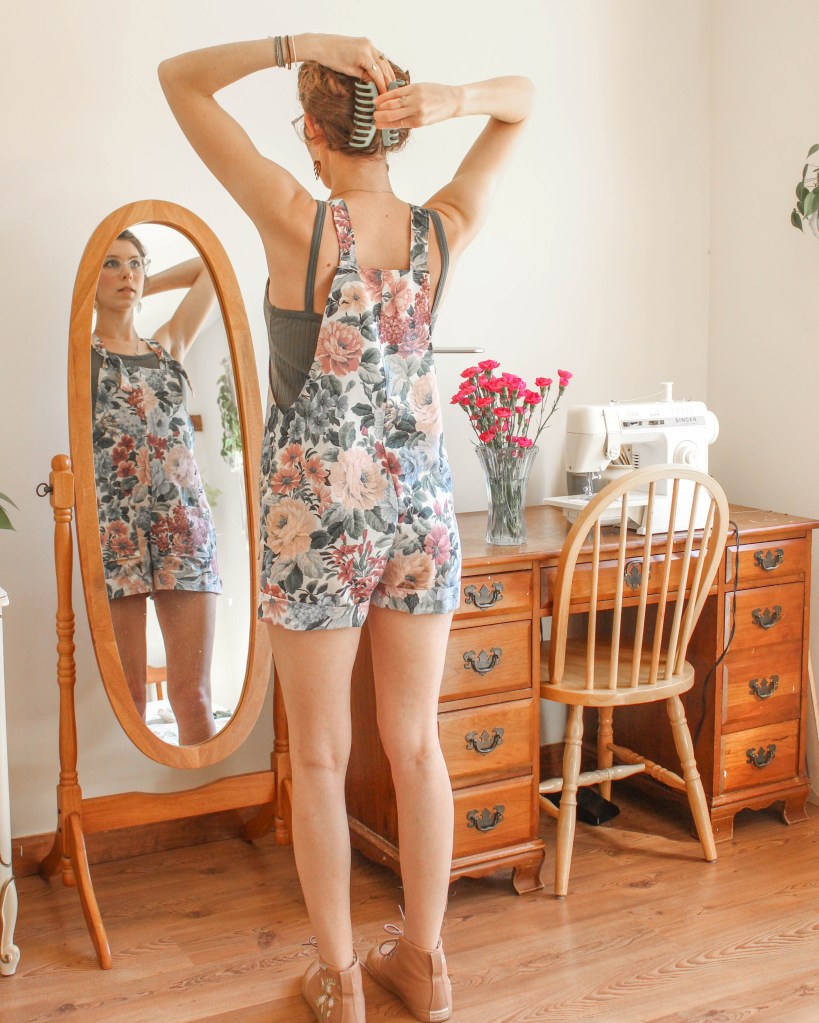
It turns out that I fit best into a size in between the “small” and “medium,” the torso was a bit too long, the side seams were too low and loose (resulting in easy underwear visibility), and I couldn’t figure out how it was possible to squeeze into the romper if both the straps were sewn on at both ends!? I mean…HELP!
So I did a little bit of my own editing…

- I added about half an inch to the outer sides of patterns, and lengthened the side seam up about 4”
- I shortening the torso by removing a strip about an inch or so thick from the center of the pattern
- I lengthening the straps to about 25”, and only sewed them onto the back side of the romper
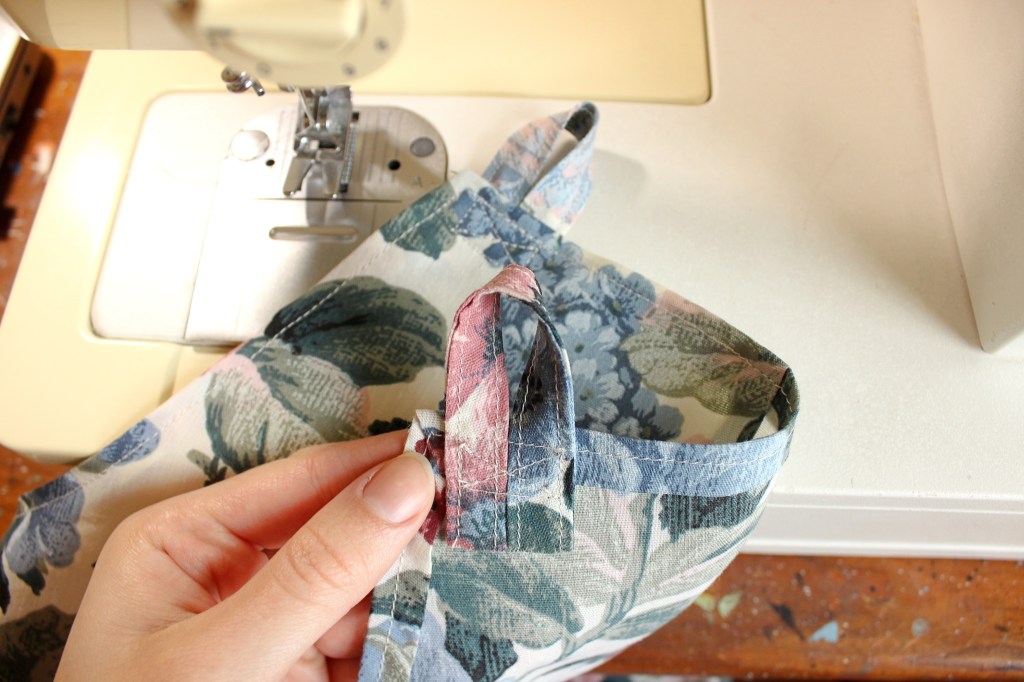
- and I made small loops to tie the straps through. These were created by cutting two 2” x 7” pieces of fabric, sewing them in half (to create a tube, right side of fabric together), turning them inside out, sewing edge seams, folding them in half lengthwise, and sewing them to the top interior side of the front of the romper. These loops not only allow me to actually get into the romper, but to custom tie the romper to whatever fit I want!

adding pockets
After I had perfected my pattern, and had sewn a few rompers for Riley Mae’s birthday gifts, I had the idea to add pockets to my own. I just created them with 7” x 7” pieces of fabric. I folded in the edges about half an inch, and the top down about 1.25”, and then sewed them flat onto the front of the romper. They’re small and wouldn’t be very useful for anything much, other than to hold a chapstick, but I loved the look, and ended up adding them to all my rompers!

All in all, the pattern was a wonderful starting point, especially since creating patterns from scratch is definitely not the easiest thing to do.
I typically find that I have to alter patterns to create clothes that fit me the exact way I want them to, but I feel like that’s to be expected if you have high expectations for the fit. After all, no two bodies are ever exactly alike!